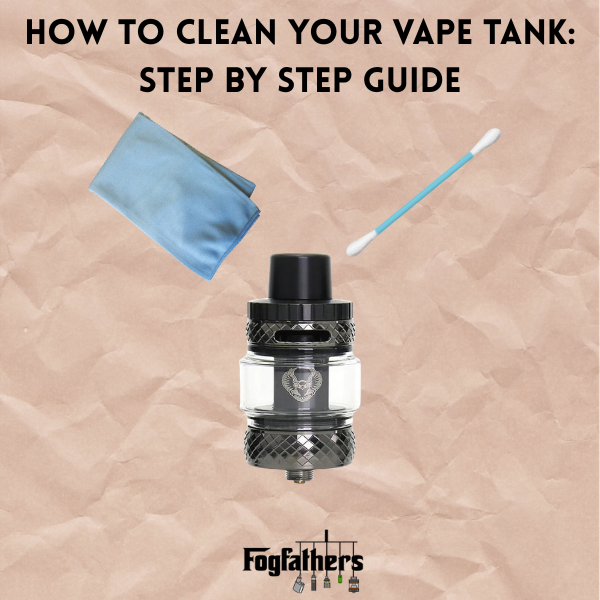
How to Clean a Vape Tank: Step-by-Step Guide
A dirty vape tank is one of the most common reasons your device starts tasting off. If you've noticed a burnt flavour, weaker vapour, or something that just doesn't taste like your e-liquid anymore, there's a good chance your tank needs a clean. It doesn't take long to sort, and you won't need to buy anything special.
Cleaning your tank regularly keeps your flavour tasting fresh and extends the life of your coils. There are a couple of ways to do it depending on how dirty the tank is. This post covers both a quick rinse and a deeper clean, so you can go with whatever suits your situation.
Why Your Vape Tank Gets Dirty
Every time you vape, a small amount of e-liquid residue is left behind in the tank. Over time, this builds up. If you switch between flavours a lot, old liquid mixes with the new one and muddies the taste. Sweetened or darker liquids, like dessert or tobacco flavours, leave more residue than lighter ones.
Residue can also collect around the airflow holes and the base of the tank. This can restrict airflow and make your pulls feel tighter than usual. In some cases, gunk builds up around the mouthpiece too, which isn't ideal from a hygiene standpoint. Regular cleaning stops all of this from getting worse.
What You'll Need
You won't need much. Most of this is stuff you'll already have at home:
- Warm water
- Paper towels or a clean cloth
- Cotton buds
- A small bowl
- Ethanol or cheap vodka (for a deeper clean)
- Propylene glycol / PG (optional, for a PG soak method)
Keep in mind: never put your coil or battery in water. Only clean the tank components, not the electrical parts of your device.
How Often Should You Clean Your Vape Tank?
| Situation | How Often to Clean |
|---|---|
| Light, regular use | Once every 1-2 weeks |
| Switching e-liquid flavours | Every time you switch |
| Heavy daily vaping | Once a week |
| Noticing off taste or restricted airflow | Clean immediately |
| After a long period of not using the device | Before next use |
If you're switching from a heavy dessert flavour to something light and fruity, a quick rinse at minimum will make a big difference to the taste.
Step 1: Empty and Disassemble the Tank
First, make sure there's no e-liquid left in the tank. If there's still liquid, either vape it down or carefully pour it out onto a paper towel. Don't tip it out down the sink as it can be harmful to the environment.
Once the tank is empty, remove it from your device and disassemble it fully. Take off the drip tip (mouthpiece), unscrew the base, remove the coil, and separate the glass section if it comes apart on your tank. Lay all the pieces out flat on a clean surface.
Step 2: Remove the Coil
The coil should be handled separately from the rest of the tank. Replaceable coil heads, the type you'd find in most sub-ohm tanks and MTL tanks, can technically be rinsed, but it won't bring them back to full performance. You might get a few extra days out of a tired coil, but you'll still need to replace it soon.
If you want to try cleaning a replaceable coil, soak it in ethanol or cheap vodka for a couple of hours, then rinse under a running tap and leave it to air dry fully. That drying process takes time. The wick inside needs to be completely dry before you use it again, otherwise you'll get a bad hit. Do not soak coils in isopropyl alcohol as it can leave a residue that affects both flavour and safety.
Step 3: Rinse Under Warm Water
For a standard clean, hold each tank component under warm running water one at a time. Give them a good rinse to remove any surface residue and leftover liquid. Use a cotton bud to get into corners, threads, and the airflow holes where buildup tends to collect.
Pat each piece dry with a paper towel, then lay them out on a clean cloth or more paper towels to air dry. Don't reassemble anything while parts are still damp. The drying step matters a lot. Even a small amount of water left in the tank can affect the taste of your next vape.
Step 4: Deep Clean With Ethanol (If Needed)
If a warm water rinse isn't shifting the residue, a deeper clean using ethanol is the next step. Ethanol is the best option here because it dissolves stubborn e-liquid buildup without leaving a harmful residue of its own. Cheap vodka works just as well. Avoid isopropyl alcohol where possible.
Add your tank components to a small bowl and cover them with ethanol or vodka. Leave them to soak for 30 minutes to 2 hours depending on how dirty they are. After soaking, rinse everything thoroughly under warm water to remove any trace of alcohol. Dry with a paper towel first, then leave them to air dry fully before reassembling.
Step 5: Try the PG Soak Method
If you want to get rid of old flavour completely without using alcohol, soaking in propylene glycol (PG) is a good alternative. PG is one of the base ingredients in most e-liquids, so it's safe to use around your tank components.
Submerge the tank parts in PG and leave them to soak for 1 to 2 hours. The PG pulls out leftover flavour residue from the surfaces of the tank. After soaking, take the parts out and place them on a paper towel. Let them drip dry naturally. This method is gentler than ethanol and can be a good option if you're switching between very different flavour profiles.
Step 6: Dry Completely and Reassemble
This step gets skipped too quickly. Every single part needs to be fully dry before you put the tank back together and add e-liquid. Leftover moisture will affect the flavour and can dilute your liquid.
Lay everything out flat and give it at least 10 to 15 minutes to air dry after the initial pat down. For any stubborn water in threads or tight spots, use a dry cotton bud. Once everything is dry, install a fresh coil (if you're replacing it), reassemble the tank, refill with your chosen e-liquid, and prime the coil before vaping.
Cleaning Tips by Tank Type
Different tanks have slightly different considerations when it comes to cleaning:
| Tank Type | Key Cleaning Notes |
|---|---|
| Sub-ohm tanks | Tend to use more liquid, so residue builds up faster. Clean weekly. |
| MTL tanks | Smaller parts and tighter airflow channels. Use cotton buds carefully. |
| Pod tanks | Some pods are not fully disassemblable. Rinse what you can access. |
| RDA / rebuildable | Coils can be cleaned more thoroughly. Dry burn gently before re-wicking. |
If you're using a sub-ohm tank for direct-to-lung vaping with higher VG e-liquids, those liquids tend to be thicker and leave more residue. You'll probably need to clean a bit more often than someone using a smaller MTL setup.
What to Avoid When Cleaning Your Vape Tank
A few things that seem harmless but can cause problems:
- Isopropyl alcohol can damage certain O-rings and leave residues that affect both flavour and health
- Boiling water can damage O-rings and plastic parts. Stick to warm, not hot
- Dish soap can work for tough staining but needs to be rinsed out completely, otherwise it affects taste
- Hair dryers on high heat can warp plastic parts. Use low heat only if you're in a hurry
- Reassembling while still damp will affect the quality of your next vape
Signs It's Time to Replace the Coil, Not Just Clean the Tank
Cleaning extends the life of your setup but it doesn't fix everything. Some signs the coil needs swapping out:
- Persistent burnt taste even after a full clean and dry
- Visible darkening or damage to the coil itself
- Muted or flat flavour that doesn't improve after cleaning
- Gurgling or leaking that wasn't there before
If the taste doesn't come back after a proper clean, the coil is most likely done. Most coils last anywhere from one to three weeks depending on how often you vape and what liquid you're using.
How to Keep Your Tank Cleaner for Longer
You don't need to do a deep clean every week if you're keeping on top of basic maintenance. A few small things help:
- Wipe down the mouthpiece with a dry cloth every day
- Don't leave liquid sitting in the tank for days without vaping
- Rinse the tank when switching to a significantly different flavour
- Store your device upright to reduce leaking into the airflow channels
- Use quality e-liquid without excessive sweeteners, as these gunk up coils faster
If you're mostly using fruity or menthol e-liquids, your tank will stay cleaner than if you're on heavy dessert or tobacco liquids all the time. Sweeter liquids leave more residue behind, so it's worth keeping that in mind when you're picking a new flavour to try.
Keep It Clean, Keep It Tasting Good
Cleaning your vape tank doesn't take long once you know what you're doing. A quick rinse once a week and a deeper clean every few weeks is enough for most people to keep things running well. The difference in flavour between a clean tank and a neglected one is pretty obvious once you've done it properly.
The main things to keep in mind: dry everything fully before reassembling, use ethanol or warm water rather than harsh chemicals, and handle the coil separately from the rest of the tank.
Ready for a fresh start? If a deep clean still hasn't fixed that lingering burnt taste, it’s likely time for a hardware refresh. Explore our full range of replacement coils to get your device back to peak performance, or treat your clean tank to a brand-new flavour from our premium e-liquid collection today.


Leave a comment
This site is protected by hCaptcha and the hCaptcha Privacy Policy and Terms of Service apply.