How to Refill Your Vape Kit Without Leaks
Refilling a vape kit sounds simple. Pull out the pod, add some liquid, put it back. But if you have ever ended up with e-liquid on your hands, pooling under your device, or leaking into the airflow chamber, you will know it is not always that straightforward. A small mistake during the refill process can ruin your whole session and waste liquid you paid for.
Most leaks come down to a few common errors. Once you know what causes them, they are easy to avoid. This guide covers the full refill process step by step, including the mistakes that lead to leaks and how to prevent them every time.
What Type of Refillable Vape Kit Do You Have?
Before you start, it helps to know what you are working with. Not all vape kits refill the same way.
| Kit Type | How It Refills | Common Fill Port Location |
|---|---|---|
| Pod kit | Remove pod, open rubber port or side port | Side or bottom of pod |
| Pen-style kit | Unscrew tank, top-fill or bottom-fill | Top cap or base of tank |
| Mod with sub-ohm tank | Remove top cap or base | Top or bottom depending on model |
| All-in-one (AIO) kit | Open fill port on pod or tank section | Usually top or side |
Most vape kits sold today use a pod system with a side or bottom fill port. These are the most straightforward to refill and the easiest to get wrong if you rush.
What You Need Before You Start
You do not need any special tools. But having a few things ready makes the process cleaner.
- Your e-liquid (more on choosing the right one below)
- A tissue or paper towel
- A steady surface
- Good lighting so you can see the fill port and liquid level
No syringes or funnels needed for most modern kits.
Choosing the Right E-Liquid for Your Kit
This is where a lot of people go wrong. Using the wrong type of liquid is one of the most common reasons for leaking.
Pod kits and lower-powered devices work best with thin, runny liquids. Nic salt e-liquids are well-suited to these kits. They have a lower viscosity, absorb quickly into the coil, and do not overwhelm a low-wattage setup. A 50/50 freebase e-liquid also works well with pod systems and starter kits.
Thick, high-VG shortfills are designed for sub-ohm tanks and more powerful setups. If you put a high-VG liquid into a low-wattage pod kit, the coil cannot absorb it fast enough. This leads to dry hits, poor wicking, and sometimes flooding as liquid pools around the coil without vaporising. If you use a tank or mod, you have more flexibility. Short-fill e-liquids with 70/30 or 80/20 VG/PG ratios suit higher-powered kits better.
| E-Liquid Type | VG/PG Ratio | Best For |
|---|---|---|
| Nic salt | Usually 50/50 | Pod kits, mouth-to-lung kits |
| 50/50 freebase | 50/50 | Pod kits, pen-style kits |
| Short fill (50ml) | Often 70/30 | Tanks, sub-ohm kits |
| Short fill (100ml) | Often 80/20 or higher | High-power kits, cloud kits |
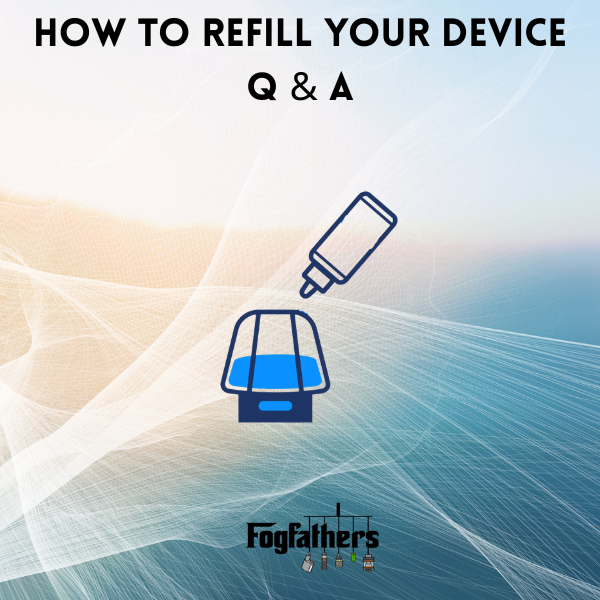
How to Refill a Pod Kit: Step by Step
Step 1: Remove the Pod
Take the pod out of the device. Hold it over a tissue in case there is any residual liquid near the fill port.
Step 2: Locate the Fill Port
Most pods have a small rubber bung on the side or base. You might need to pull it back slightly with your fingernail to expose the opening. Some pods have a press-fit cover rather than a rubber plug.
Step 3: Angle the Pod and Fill Slowly
Hold the pod at a slight angle, around 45 degrees, so the fill port faces upward. Insert the tip of your e-liquid bottle into the port. Squeeze gently and fill slowly.
Do not rush this step. If you squeeze the bottle too hard or fill too fast, air has no way to escape, and liquid can back up into the airflow channel instead of going into the tank chamber.
Step 4: Do Not Fill to the Very Top
Leave a small gap of air at the top. About 10 to 15 per cent of the tank should stay empty. Without that air gap, pressure inside the pod increases when you put the cap back on, which pushes liquid out through the coil and into the airflow. This is one of the most common causes of leaking.
Step 5: Close the Fill Port Properly
Press the rubber bung back into place firmly. If it is not fully seated, liquid will seep out around it. Give it a firm press to make sure it sits flush.
Step 6: Let It Sit for a Few Minutes
Before you take a draw, let the liquid settle into the coil for at least five minutes. This is called priming. New coils especially need time. If you vape straight away, you risk a dry hit, which can burn the coil and affect the flavour for the rest of its life.
If you have a brand new coil, put a drop or two of e-liquid directly onto the coil head through the bottom of the pod before installing it. Then fill and wait.
Why Is My Vape Still Leaking After Refilling?
If you followed the steps and still have a leak, the cause is usually one of these:
- Overfilling: the liquid has nowhere to go when the pod compresses during vaping
- Wrong liquid viscosity: thick, high-VG liquid in a low-wattage pod kit floods the coil because it cannot absorb fast enough
- Worn or cracked pods: pods have a lifespan and the seals degrade over time
- Damaged fill port bung: If the rubber has torn, the port will not seal
- Coil that needs replacing: saturated or worn coil floods easily
- Vaping at too low a wattage: the coil cannot vaporise liquid fast enough and it builds up
- Drawing too hard: excess suction pulls liquid through the coil before it can be vaporised
Check your coil first. A flooded or worn coil is often the root of the problem.
How to Avoid the Most Common Refill Mistakes
Two habits cause the majority of leaks. Overfilling and not seating the pod back in the device properly.
On the overfilling point: the liquid level window (if your pod has one) shows you when to stop. If yours does not have a window, fill slowly and check every few seconds. Stop when the liquid is about 90 percent full. On the seating point: when you push the pod back into the device, it should click or sit flush. If it is loose, airflow can enter through gaps and pull liquid with it.
Other things worth watching:
- Store your device upright when not in use. Leaving it on its side, especially with a full pod, causes liquid to sit against the coil constantly and seep through
- Avoid vaping in extreme cold. Cold liquid thickens slightly and absorbs more slowly, which increases the chance of flooding
- Do not leave a filled pod sitting unused for more than a couple of days. Liquid can degrade, and the VG/PG balance may shift slightly over time
When to Replace Your Coil
Leaking that keeps coming back often means the coil needs changing, not the filling technique. Signs a coil needs replacing:
- Burnt or harsh taste
- Gurgling sound when you vape
- Reduced vapour production
- Visible discolouration through the tank window
- Persistent flooding even after refilling correctly
Most coils last between one and three weeks, depending on how often you vape and what liquid you use. Sweet liquids with high sucralose content burn coils faster.
If you find yourself going through pods and refills more quickly than expected, it may be worth trying an unflavoured or lightly flavoured e-liquid to extend coil life.
How to Tell When Your Vape Needs Refilling
Running a pod too low is just as damaging as overfilling. When the liquid level drops below the coil's wicking ports, the coil heats dry cotton and burns it. A burnt coil cannot be recovered.
Signs your pod is running low:
- Flavour becomes muted or slightly off
- The hit feels thinner or less satisfying
- You can see the liquid level near or below the wicking holes in the coil
Some kits show an indicator light when the pod is low. But not all do. It is worth checking the liquid level visually every day or two, especially if you vape regularly throughout the day.
Refilling a Tank vs a Pod: Key Differences
If you use a tank-based kit rather than a pod system, the refill process works a little differently.
Most tanks use a top-fill method. You unscrew the top cap, tilt the tank slightly, and fill down the inside wall of the tank rather than straight down the centre. Filling straight down the centre can flood the central airflow tube and cause immediate leaking.
After filling, close the top cap and wait a minute or two before vaping. Keep the tank upright during this time.
Bottom-fill tanks are less common now but require you to unscrew the base. Always make sure the coil is firmly seated before filling a bottom-fill tank. A loose coil is the main cause of leaking with this style.
A Note on E-Liquid Nicotine Strength and Leaking
Nicotine strength does not directly cause leaks, but it does affect how you vape. With a higher nicotine strength, most people take shorter, lighter draws. With a low-nicotine or zero-nicotine liquid, draws tend to be longer and harder to feel satisfied. Long, hard draws increase the risk of liquid flooding through the coil.
If you get regular flooding with low-nicotine liquids, moving to a slightly higher strength might help. Shorter draws put less pressure on the wicking system, which reduces the chance of flooding.
A Note on Liquid Storage
Storing e-liquid properly also reduces the chances of problems during refilling. Keep bottles away from direct sunlight and heat. Heat thins the liquid, which means it moves faster through any small gap or loose seal. Room temperature and a dark cupboard is all you need.
Avoid leaving bottles with the cap loose or half open. Air exposure over time changes the character of the liquid and can affect how well it wicks into the coil.
Getting It Right Every Time: A Quick Recap
Here is everything covered in this guide in one place:
- Match your liquid type to your kit
- Fill slowly at an angle
- Stop at 90 percent capacity
- Seat the fill port bung properly
- Leave it for five minutes before vaping
- Store upright when not in use
- Replace coils before they flood or burn out
Stick to these, and leaks will be rare.
Leaks Are Usually a Technique Problem, Not a Kit Problem
Most people who deal with leaking vapes are one or two habit changes away from fixing it for good. Get the liquid type right for your kit. Fill slowly and stop short of the top. Seat everything properly. Prime the coil before you vape. Those four things alone will sort the majority of leaking issues.
If you have the process down and just need to stock up on liquid, Fogfathers carries nic salts, 50/50 e-liquids, and short fills across a wide range of flavours and nicotine strengths. Free UK delivery on orders over £20.
Leave a comment
This site is protected by hCaptcha and the hCaptcha Privacy Policy and Terms of Service apply.